Thursday, December 21, 2006

2007 Resolutions

  • Learn to love pain--you know, the pain that comes from pounding, lifting, stooping, crouching, and/or reaching all day.
  • Learn to breathe better through snot choked with plaster dust.
  • Figure out how to look sexy in a respirator.
  • Get over my fear of spiders, 'cause apparently they aren't going anywhere....
  • Find and embrace my inner electrician.
  • Do a better job documenting befores and afters.
  • Paint a room (just one) withOUT getting paint in my hair.
  • Paint a room (just one) withOUT somehow painting cat hair onto the wall along with the paint.
  • Spend more time in the attic (I realize this sounds creepy, but we really need to insulate up there).

I'm tired already.

Tuesday, November 28, 2006

Stripping woodwork, or the love affair I am currently having with my heat gun

Ooooh, heat gun, I like it when you get SO hot for me. (*of course not so hot as to create lead paint fumes....safety first!) Your blowy hotness makes that paint bubble so good, oh so good.

Maybe I am releasing lead paint fumes, and they've gone to my head. :)

I have been a paint stripping fool over the past few weekends. Which made for an interesting Thanksgiving, because we had a housefull of people and I felt compelled to explain to each and every one of them why our bathroom door looks like it's been sunburned and is now peeling. Why our kitchen trim is in various stages of undress (using it to test times/amounts of heat, etc.). Why there is a respirator rather than a centerpiece on our dining room table (I did move it before we all sat down to eat.)

No pictures--sorry, but when I'm stripping paint I become very focused. And later, when I'm not so focused, I want to stay as far away from my current project as possible. Tough to do when your current project is also the only room in the house in which you can bathe. But trust me, I'm bathing--I'm just trying not to look at the door when I'm in there.

Tuesday, November 07, 2006

Winterizing is a HUGE pain in the butt

Our house is drafty. We've no plans to insulate the walls and risk ruining our plaster and/or siding, since that's not where most heat loss occurs anyway, and for the time being we can't insulate the attic because the only access to the attic is a 16x22 inch cubbyhole. Try stuffing a roll of fiberglass through that!

Still, it's c-h-i-l-l-y. Plus, those trees that provide such lovely, cooling shade in the summer, provide the same lovely, COOLING shade in the winter! So, the falling leaves signal to us that we need to start winterizing for the cold months ahead.

First, we bring 24 bales of straw to insulate the foundation. This worked like a charm last year; we never had frozen pipes, even though our laundry pipes run through an uninsulated crawl space. The straw also makes a great mulch the following spring. This year, we bought extra bales to insulate The Ladies' coop. I don't know how much they appreciate it, but we figured that if we were going to winterize ourselves, we ought to winterize them as well. After all, they've only got feathers--and each other--to keep them warm!

Straw bales, check. Now for weatherstripping. Last year we did just the rooms that we used, and we closed off the rest of the house. This year, we'll continue closing off the unused parts of the house, but we'll finish the weatherstripping. Then, we'll put up those ugly plastic "storm windows" on every window in the house. Yeah, that's a treat. Next year we are planning to re-replace the horrid 1960s-era aluminum replacement windows with true divided-light double-hung wood windows. Hopefully, we'll do wood storms then as well. But until then, it's plastic all the way, baby!

Last but not least, we'll turn the thermostat down to 55 (not a typo) and break out the blankets! It's amazing how comfortable we can get when there's down somethingorother to snuggle into. The cats love winter, for just that reason. Down comforters and blankets are snuggly!

Good for the barn, bad for G and V

Well, we have gotten official word that the final roadway alignment doesn't call for the barn to be demolished. While I'm very pleased that the barn isn't in any immediate jeopardy, I must admit some disappointment that it won't be coming to live in our pasture!

[Heavy sigh]

Oh, well. We'll nab ourselves a great historic barn someday!

Monday, October 16, 2006

Black walnuts! (alternately titled, what I did with a mallet all day Sunday)

Our black walnut trees have been bombarding us with nuts for about a month now. At long last, it appears that the days of dodging and weaving are coming to a close for another year! There aren't many nuts left--which is a good thing because those suckers HURT when they make contact. HURT. Have I mentioned how much those buggers HURT?

We have been collecting the nuts in our little garden cart, and yesterday I began the thankless task of husking them so we can cure them in anticipation of some serious Black Walnut yumminess. Putting them on the driveway was the easiest dehusking method at hand, but we were a little iffy about actually doing it because the last thing we need is for a walnut to come hurtling from underneath our tire and take out a window, some siding, or our neighbor (whoooooooosh....d'oh! Sorry 'bout that, Earl!). So I thought I'd take the mallet to them. I started out strong. Two good whacks and I had a clean nut ready for the curing screen. About 400 nuts later, my hand was good and cramped, and it was taking more whacks than I care to admit. So I took the rest (yes, the 400 barely made a dent in the cartload) and dumped them onto our driveway. I guess if we send one flying at high velocity we'll just have to live with the consequences. And I'm really looking forward to having fresh nuts around! Mmmmmmm!

Wednesday, October 11, 2006

Ohpleaseohpleaseohpleaseohpleaseohplease

There is a possibility, probably slight but still a possibility, that V and I will be relocating a Mail Pouch barn onto our little farm.

!!!!!!!!!!!!!!!!!!!!!!!!!!!!!!!!!!!!!!!!!!

This all came about in a very seat-of-the-pants way. I was riding home from a horse show with my trainer and her mom when we passed by a lovely historic barn (I wrote my masters thesis on barns so I'm always quite the barn looky-loo!) and I commented on it. My trainer tells me that the state DOT is going to torch or bulldoze it because they're doing a highway widening. My response was to beg her to get in touch with her contact and see what she could find out. So now we're calling the DOT and trying to find out what exactly they're planning for it. I haven't been inside, but it appears to be in remarkably good condition. My gut is that it's a timber frame rather than balloon, which will make it easier in some ways to disassemble. All things being equal, we might be able to take down entire bents rather than going beam by beam. That would make reassembling much, much easier--fewer parts to put back together! One of these days I'll brave the trespassing charge and take a peek inside to gauge the condition and check out the construction.

It may not be realistically feasible for us, but we're sure going to try to bring it home. Right now our plan is to probably disassemble it, load it onto a flatbed, truck it to our farm, and put it on pallets and tarp it until spring. This will A) allow us more time to get some cash together to get footings poured, etc., and B) allow us some time to figure out just exactly where we'd like to put it.

Please, everyone, keep a good thought for us. We have long wanted to do something like this, and it looks like this might just be our chance. Now we really need to find that buried coffee can of gold!

Thursday, September 21, 2006

The Chicken Whisperer

Let me tell you about my pet (apparently) chicken. Lisa is one of The Ladies, as they are collectively called. She provides us with delicious brown eggs that are good enough to eat! Seriously, folks, if you have any room at all and want to make a big change in the quality of eggs you're eating, buy a few chickens. I cannot believe how yummy a hard-boiled egg tastes from these free-range, clover munchin', bug chompin' ladies. What a difference!

But I digress. Back to Lisa. We had five chickens--two Ameraucanas (Fiona, Stella, and Edie) and two Golden Comets (Mattie and Lisa) . All too sadly, Mattie died last month. It was heartbreaking. I will readily admit that I cried -- a LOT -- for that chicken. And since then, Lisa has seemed a bit lonely. Like she knows the other three are of a different breed, and she doesn't really fit in. They all get along and all, but Lisa is a little bigger and is a different color (can chickens see in color?), and I just think she feels a little out of place.

Enter me, Lisa's new BFF. We let The Ladies out to free range every day for anywhere from 30-45 minutes. They love to have new turf to scratch up and they are tremendously entertaining to watch. Lisa has taken to following me around . . . and if I bend down, rather than running away as she used to (and as the others still do), she will sort of crouch and wait to be petted. It's awfully cute to see. After a few strokes she'll get up, ruffle herself, and join her buddies in the scratching and bug chasing. But she never gets too very far away from me.

Sidebar: I was telling a friend this heartwarming, or what I thought was heartwarming, story, and he commented thusly: "I dunno, sounds an awful lot like Lisa is going into a breeding crouch for you. Apparently you're her boyfriend."

I will continue to think that she views me as a sister, or cool best girlfriend, or something. I'm no one's rooster.

Monday, September 18, 2006

Two whole days off--what house projects do I want to take on?

Someone wise once wrote that you know you're an old house owner when you look forward to vacations as time to work on the house. That's exactly what I'll be doing next week. After a particularly difficult couple of weeks (read: months) at work, I am going to take a Friday/Monday combo off. And the house better look out!, because I'm coming at her with tools in hand and a whole lotta determination.

High on my list:
  • Whip out the heat gun and strip some trim and maybe a few doors while I'm at it
  • Finish the two huge lasagna beds outside before it gets too cold...then they can just sit there all winter while we work on stuff inside.
  • Start yanking up carpet.
  • Start listing house-found items on eBay. It's time. We're tripping over ourselves, and we could use the cash! Our checking account is starting to look mighty pitiful.
  • Finish the sweater I began knitting for V three seasons ago. The same sweater I have been promising to have finished by "the next cold season." Gee, I wonder why he's stopped believing that?

Since I am a chronic overscheduler, I figure that I'll be able to get at least three of the above finished. I believe I will plan to finish that sweater (honest!), strip the trim/doors, and begin eBaying my little heart out.

I'm so looking forward to having a nice long weekend to do nothing but house stuff. This has been a long time coming.

Wednesday, September 13, 2006

What kinds of plants I winter sowed

Here's a partial list of what I successfully grew from seed over the past three years. I had never, ever managed to grow something from seed before now.

--sunflowers (4 varieties)
--blanketflower
--daisies (several varieties)
--herbs (catnip, basil, chives, flat parsley, thyme, anise hyssop, rue, oregano, dill, cilantro)
--coleus
--black-eyed susans (a couple of different varieties)
--butterfly bush
--nicotiana
--perennial flax
--rose campion
--decorative grasses
--trailing lobelia
--forget-me-nots
--tomatoes (yes, tomatoes)
--calendula (which quickly became a HUGE favorite of mine)
--celosia
--columbine
--bachelor buttons (annual and perennial)
--impatiens
--scented stock
--marigolds (several varieties)
--red penstemon
--tons of poppies
--sage (purple and traditional)
--coneflower
--coreopsis
--allium
--chamomile
--tithonia ("Mexican Sunflower")

There are others, but without looking at my log (yes, I'm a dork, I kept a log) I can't list them all. These are just off the top of my head.

Gardening on the cheap--winter sowing!

You will not believe me. I understand that you will not believe me. What I am about to tell you, however, is completely true and is unexaggerated. You can sow seeds all through the winter and in the spring, you will most likely have more plants than you can shake a stick at!

I am a huge fan of a process called winter sowing. I was turned on to it a few years back by the kind folks over at the GardenWeb. There is a Winter Sowing forum that I was encouraged to check out. So many threads from people who were wildly successful with growing plants from seed. I had always thought growing from seed meant light setups, a greenhouse, and lots and lots of work. But the more I read, the more winter sowing made sense--think of it as doing what Ma Nature does, but you're just helping her along a bit. Plants typically go to seed in the late summer/early fall. Those seeds fall to the ground, where they stay until they're scratched up and eaten by birds and squirrels, or they germinate and grow.

To winter sow, you take containers of whatever kind (I use milk jugs, orange juice jugs, whatever I can find--bonus, it's recycling!!), take the lids off, cut the tops of the jugs partially off leaving a "hinge," put potting soil into them about 4" high, press seeds into the soil, moisten thoroughly, tape the tops back on, and set the whole deal outside to face the winter. You do not bring them inside, even when there's a blizzard on the way. Snow, ice, etc. will not hurt your seeds in their protective little homes (for a more detailed explanation go to wintersown.org) .Basically, you're creating mini greenhouses for your seeds. When the temperatures start to rise, you'll see your containers bursting with seedlings. :) My first year I sowed about 110 containers and had enough to entirely fill a 30x20 foot bed, plus I gave dozens of plants to friends, neighbors, complete strangers....you get the picture. Let's just say I was very successful. And my total outlay of cash was about 20 bucks for enough potting soil to fill all those containers.

The two best things about winter sowing (in my opinion) are that it is tremendously cost-effective--just the cost of potting soil and seeds, and sometimes you can get seeds from a friend's garden for free, and it's a good way to recycle all those plastic jugs we accumulate throughout the year.

If you'd like to have a huge, lush, full garden, I really encourage you to look into winter sowing. I think you'll be pleasantly surprised!

Tuesday, September 05, 2006

Here's to you, fellow bloggers!

I have been reading a lot of posts from fellow bloggers who have serious restorations on their hands. They are sharing living space with raccoons and other critters because their houses have no windows, or they are showering at the local truck stop every day because the bathroom is completely nonfunctional. Or they are attempting to have the semblance of a normal life while not one single room of their home is livable.

My hat is off to you, ladies and gentlemen. You know who you are. When I read your posts I am simply overwhelmed at the patience and care you display.

Keep on rockin'.

Thursday, August 24, 2006

Walk-in closets....sigh...a girl can dream, can't she?

Here are sketches of our proposed addition. We are planning to bump out the existing kitchen/bathroom to the north about 10 feet and add a bathroom and laundry room on the first floor, then a bathroom and (gasp!) master walk-in closet on the second floor.

Feast your eyes on these babies! :) Aren't they beautiful?

The two potential layouts for the first floor laundry/bath...I'm partial to the one on the left because it has all that glorious counter space!


And the two potential layouts for the second floor bath/closet....these are very similar. I think the only difference is that the room sizes change a wee bit from layout to layout.

Yippee! It worked better than I thought it would!

Aren't you just ECSTATIC when something actually lives up to its own hype? I know I am! Take for instance my ongoing quest to have sparkling clean white laundry. Between the minerals in our well water and the natural tendency of white laundry to become dingy over time, I thought I was fighting a losing battle. Optical brighteners didn't really do anything. Bleach just turned them yellow. Oxygenating detergents didn't do anything. Nor did copious amounts of Spray&Wash. Ugh. How frustrating.

Enter my book of old-fashioned/frugal remedies and simple country living. I flipped through to see if there was any information to be found on laundry. In fact, there was! Baking soda and white vinegar was supposed to do the trick. There were no real measurements listed, so I just took a bucket and put about 1/4 cup of baking soda in, then poured probably 2 cups of white vinegar. First of all, be forewarned: this stuff FIZZ-FIZZ-FIZZES and if you don't have enough "headroom" you could end up with quite the volcano!

After it had stopped making with the fizz, I simply immersed those pieces that were dingy to my eyes, let 'em sit for a few seconds, then tossed them into the washer. When I began pulling pieces out to put them into the dryer, I could hardly believe my eyes. All of the white laundry looked brighter. Every single piece. I guess from the soda/vinegar clothes swishing around with the rest of it. And the items that been dunked in the solution came out super white. Success at last!! I'm a believer.

Now if I could just find something in that book about how to do major home improvements --you know, like patching plaster, stripping wallpaper, repointing a foundation, stuff like that -- with baking soda and vinegar.

Thursday, August 17, 2006

Good news on the cat front

I don't remember if I posted that our orange foofy cat, Romeo, has diabetes. He was diagnosed about 9 months ago, and we think the diabetes is a direct result of a steroid our previous vet had him on for a chronic gum inflammation. Fast forward to Romeo's first visit at the new vet--we had brought him in because he'd lost some weight pretty rapidly, and was also losing fur. Immediately (before she even introduced herself) she says to me "I think your cat is diabetic...have you ever tested his blood sugar?" I didn't think we had, so she drew blood and tested. His numbers were through the roof! Normal is anywhere from 80-100ish, and he was over 400. Still, she was reluctant to put him on insulin in the hopes that, once we stopped giving him the steroid, his diabetes would resolve itself. Nope. No luck there. His glucose numbers continued to be very high, he continued to lose hair and act lethargic, and we continued to worry. I really didn't want to start him on insulin because it's scary enough to use with humans, who are capable of self-testing and all that. We home-test Romeo, but the equipment is not as accurate for kitties as it is for people, so there's some worry there. More than anything I was worried about giving him too much because I made an incorrect judgement.

Deep breaths. Deep breaths. Deep breaths.

At long last, I'm overjoyed to report that his diabetes seems easily controlled with diet. No longer on free fed kibble, Romeo now gets two square meals a day of yummy diabetic canned food mixed with chicken baby food (OK, so he's a little spoiled. What can we say? We love the big lug.). His numbers are now consistently between 90 and 120--and he's not on insulin. We can definitely live with those.

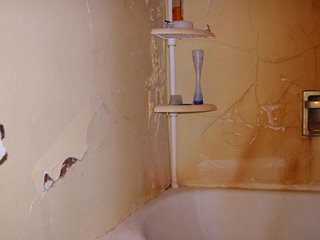
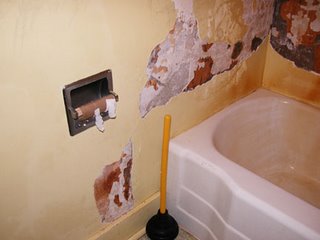
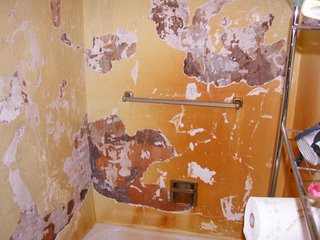
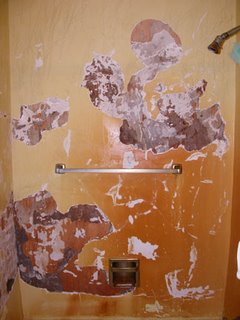
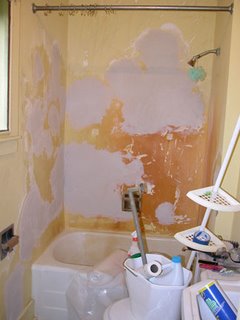
Why I got plastered (AKA the before pictures of the Bathroom of Frankenstein)

Well, I finally got around to resizing these for the web. Behold, the before pictures! I cannot believe what condition our walls were in before I got down and dirty with lime. :-)

This is what it all looked like before demo. I wish you could see just how ugly and bulging the walls were. You also can't see the areas where the plaster had been reduced to simple sand that trickled out steadily into the bathtub (good thing the tub is too small to take a good bath in anyway...). Alas, those endearing aspects simply did not photograph well. But you can sure see the cracking, which had progressed far beyond the hairline stage.


I began chipping away small pieces in the worst spots . . .

And soon discovered that we had two full walls' worth of "worst spots"! ACK!

This picture shows what things looked like after the scratch coat and the brown coat. After these finished curing I ended up having to skim coat the entirety of both walls in order to get a decent finish. And, I'll admit it — I got uber lazy on the skim coat for the back wall. Since we put up a shower liner to avoid having rust stains all over the place again, I figured no one would really ever see that wall, so my efforts to really skim coat that smoothly and nicely were....ummm, shall we say less than robust. Still looks a whole heckuva lot better than it did, though! I'm not sure if I have any pictures of the skim coat before painting. Skim coating, for whatever reason, turned out to be an even filthier job than doing the first two coats!

I couldn't be happier that we're going on a couple of months, and the plaster seems to be holding up well. Rapping on the wall yields a nice solid sound, and it no longer makes that crumbly sound every time you accidentally hit it with your [insert body part here].

Monday, August 14, 2006

Ponderings on karma

Well, the appraiser has been through, and while there were no real surprises (we won't be financing our entire restoration from the sale of an old pair of pliers found in the crawl space...), the bottom line is that we have some very nice pieces.

Most of them will be staying with us, but there are some that V and I are really torn about. Like I mentioned in a previous post, the huge cedar chest is chock full of all sorts of lovely linens and textiles. What to do with those? We're trying so hard to be true to the original intent of the house and its owners...so what does that mean for the baby bonnets? Or the fine linen towels? I'd love for them to go to someone who can appreciate them and give them the kind of home they deserve. But would I just be asking for a heapload of bad karma if I sold them? Should they be donated to a museum, if I can find a taker? That wouldn't help the financial situation with the house, though.

Sometimes I wish I didn't love this house so much. Then I wouldn't give a rat's behind about what we do with the contents that we cannot use. I don't want to live in a museum, but nor do I want to sell or give away things that truly should stay with the house.

All that said, I don't think I've posted any pictures of what we found in the chest. If I've already posted these, my apologies but too bad. You'll just have to look at them again!

I'm too tired to really caption these with any care or accuracy. Hopefully the pictures will speak for themselves.
This is a Victorian (?) sash belt with enameled buckle. LOVE this piece, just love it. No idea what to do with it because it sure wouldn't fit around my waist! (it's about 20" give or take)

Scarf or runner of some sort? No clue.


An absolutely GORGEOUS child's dress.


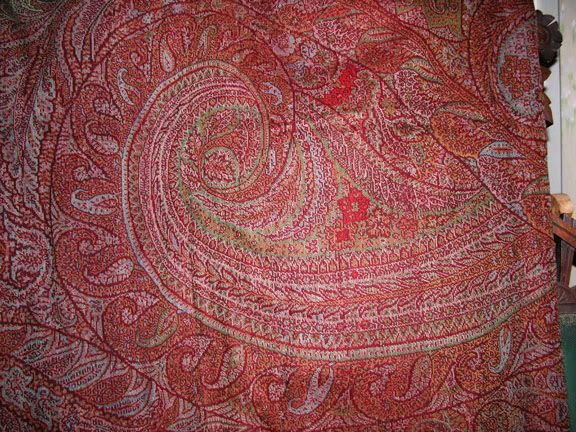
I was pretty clueless about this piece until the kind folks over at the eBay forums told me it's probably a piano scarf or a Victorian paisley shawl. It's about 6x6 or maybe 7x7 and is simply beautiful.


And here's a link to the whole shebang--at least what has been photographed and/or documented in some way. Mostly linens and porcelain. If you see anything worth millions please let me know. ;)

http://s76.photobucket.com/albums/j13/ginam01/?action=view&slideshow=true

Thursday, August 03, 2006

Would you buy organic (or at least natural ingredient only) dog shampoo?

My friend and I have been talking about ways to make some extra cash and hopefully in the process build up a business that is strong enough for us to cut back a little on the ol' work schedules as they are right now. Work just has not been fulfilling these last several months. I'm finding myself very apathetic about marketing. If I could do preservation work full-time, I'd love it, but it's a hard field to break into, especially for woman and especially in the trades. We aren't in a place financially where I can just leap into a complete career change, but the more time I spend doing things other than marketing, the antsier I get to make the switch!

I'd call what I'm going through a midlife crisis, but I'm not quite to midlife yet. I guess I'm having a pre-midlife crisis. Anyway, we came upon this idea to make earth-friendly, natural, as organic as possible, pet products: shampoos, detanglers, treats, even collars/leashes and sweaters and the like. Since she has a dog and we have the cats, we have our test subjects all lined up, and we have friends with ferrets, birds, and rats/hamsters/guinea pigs. So we basically cover the spectrum of common pets. We're going to start working in our test kitchen this week, trying to develop a good basic line that is expandable if the need arises in the future.

Any pet owners out there? Would you spring for stuff like that, as long as it was not prohibitively expensive? We're counting on you to say YES! :)

Bathroom of Frankenstein

Maybe I shouldn't say it that way. It's not really that bad. But our bathroom is definitely still not entirely up to snuff. The plaster work I did is still holding up, even the patches of the patches (see my earlier angst-ridden posts about my hard work on our plaster and the subsequent heartbreaking cracks that appeared . . . ), but there's still a ways to go.

It's been too bloody hot to break out the heat gun, and we have not yet knuckled under and actually purchased a Silent Paint Remover (it is on the short list, especially since we borrowed one for a time). Thus, the trim is still all canary yellow, which looks positively smashing against the rust-colored walls (rust colored to match the rusty mineral water from our well--if you can't beat it, join it!). There is one strip, about 2 feet long and 4 inches wide, that I stripped with the heat gun before our temperatures became like those on the surface of the sun. I just won't strip paint when the temperature is in the triple digits.

And then there's the area behind the toilet. We don't particularly want to take the toilet apart in order to plaster and paint behind it, so what we're thinking of doing is (shhhhhh!) a quick-and-dirty fix that will improve it aesthetically, but that won't require dismantling or moving of major fixtures. We're going to find a thin piece of plywood, paint it the appropriate rust color, slide it behind the toilet, and screw it into the wall. I know, I know, it's not the ideal way to go about things, but this bathroom will, very hopefully, be completely redone and enlarged in the next year or two, so I think we can make ourselves live with a quick fix. Most people probably won't even notice by the time we're done, and we have an over-the-toilet etagere because of our total lack of storage in the bathroom. The etagere will also hide most of our sinful coverup.

Don't tell anyone. I trust that my secret is safe with you!

Wednesday, July 26, 2006

Horse show or train wreck...you be the judge!

I showed in my very first ever dressage show on Sunday. What an experience! On Saturday, I had a final lesson with my trainer, who was very pleased with how well things went. I ride one of her horses, a fabulous Steady Eddie with just enough fire to be a fun ride. He's definitely been around the block and has shown most of his life. My trainer told me he'd be a little livelier at the show because they always give him an adrenaline rush. But I'd seen him at shows before; he was always very forward-going, soft, and just lovely. I was really looking forward to the show.

Then came show day. Suddenly my -- gelded, I should note -- Steady Eddie Arabian mount thinks he's a wild stallion roaming the desert gathering himself a harem!! The warmup ring was a joke. He just would not listen to me. Giraffe neck, not focused, uneven tempo to his gaits. Not good signs. We got into the ring to do our first test and things really fell apart. I'll spare you all the gory details, but suffice to say the judge was NOT impressed with our performance. Our score was pretty sad.

The second test went somewhat better. At least I felt like I had more of my Steady Eddie and less Walter Farley's Black Stallion. It still wasn't great, but it was better. We ended up placing second in our class, and I came home with a big pink rosette, which made me pretty happy. I have no idea what got into him at that show. Well, my trainer was right--he was definitely "livelier"!!!

Friday, July 21, 2006

More projects than money

V and I have been spending money like we have it lately. :) It's all for stuff we need (well, mostly), but boy oh boy is it difficult to watch that savings account self-drain!

Now we've got a ton of projects we want to work on, and no money! We're going to have to get creative and work for a while on things that require more sweat than cash. Looks like it might be time to start pulling wallpaper down, or carpet up! I'm itching to see what condition our first-floor hardwoods are in...if they're anything like the rest of the house, they'll look great. But you never know.

If there's anyone who follows this board and has splendoriferous ideas for no- or low-budget projects, by all means bring them on! I can only watch so much TV. I need to work!

Monday, July 17, 2006

Ye olde cedar chest

Well, our visitors had a great time, as did we. We really enjoyed the whole weekend, even though the temperatures were nearing Hades-like highs. And oh, the humidity! It was like breathing underwater. Under really hot water, no less. But still, we all had fun. The house sure did seem quiet on Sunday afternoon!

While they were here, we had a little fun time with the house. There are storage spots we have not yet gone through completely, either from lack of time or from lack of accessibility, or maybe just lack of knowing what to do with stuff once we find it, so why not leave it where it is until we catch a clue or two???

So over the weekend we sat down and decided it'd be fun to go through the cedar chest in our bedroom. This thing is mammoth--as wide as a full bed and at least two feet wide as well as two feet deep--and we've opened it but have never pulled anything out of it, really. Besides the parasol that was sitting right on top of everything (which we had seen the first time we opened the chest), we had no idea what we'd find. So what did we find? Tea towels by the dozen, some still wrapped in tissue and obviously unused; bed linens; table linens; a baby dress with home-tatted lace (at least that's what the note tucked into it said); fabric scraps from assorted wedding gowns and other important garments; several lovely handkerchiefs; and several pairs of woollen stockings that still had the original tags on them. They're beautiful, but it's very difficult for me to imagine wearing these on a daily basis! Talk about a different time. I whine and cry if I have to wear anything on my legs at all besides Sally Hansen's airbrush pantyhose (if you haven't tried them, do--they're fabulous!).

Wednesday, July 05, 2006

We've got visitors coming

V's brother and his family are coming for a visit, which means two things:
1) we're super excited to get to show off the house
and
2) we're super freaked out because the house is nowhere near ready to show off

Our to-do list just got a little more, um, time-sensitive. We want to get the bathroom in decent shape, and we've got more than a little cleaning up to do. Yesterday we tidied up the guest bedroom and put clean sheets on. Whenever we have houseguests I like to pretend that we're the kindly proprietors of a B&B, so I leave fluffy towels and personal soaps on the bed. I also leave a few magazines for nighttime reading.

But back to the to-do list. We've got to clean up the grounds big-time, I have to finish painting the garden bench my dad made for us (that probably deserves its own post, because it totally ROCKS), we have a half-finished garden bed that we should at least mulch so it doesn't look so hideous, and then there's the inside. Clean, clean clean! Rearrange some furniture, maybe patch a few holes in the plaster (it's good motivation to do it, so why not do it while I'm motivated?), figure out how to make it not quite so swelteringly hot upstairs in the bedrooms without turning our AC down to 50 degrees or something....

Cripes, what am I doing sitting here typing? I should be working!

Friday, June 23, 2006

Welcome to appraisals 101

We finally made the call to a local auction house with the intention of getting a whole-house appraisal. The last appraisal of any of these goods was in 1982, and most items were not even appraised--none of the toys, dolls, ephemera, china, or costume jewelry. Obviously, it might not be worth the cost to appraise it, but how will we know unless we do it?

The auction house is very well-known, and they were super helpful. They charge an hourly rate, which we can shave down by doing some of the legwork ourselves, like setting up the spreadsheet. It's time-consuming but doesn't require specialized skill. Yep, that fits our potential level of involvement--not that we have loads of time, but we certainly don't have specialized skill! The last appraisal they did on a house about the size of ours took 4 full days. The cost for that would prove quite prohibitive for us, so we're looking for any way at all we can keep those dollars from adding up too much!

So, in the not-so-distant future, V and I will slowly, painstakingly, laboriously go room by room through all 2200 square feet of the house and enter items piece by piece onto a spreadsheet. Then, we'll call in the big guns. Eventually, we'll probably put some things up for auction, but it'll be difficult to figure out what. Now, if we find out that the whozitwhazzit that has been tucked away, forgotten, in a closet for 100 years is worth tens of thousands of dollars, our job will become a whole lot easier!

G'on, EGG me on. It'll be EGG-cellent!

In case you did not guess from my rapier-sharp witticisms above, one of The Ladies has graced us with an EGG! A lovely, large, deep olive-green egg. I took pictures (because that's just who I am) but have not downloaded them yet. We don't know which gal took it upon herself to finally give up the goods--just that it had to be one of the three Ameracaunas because of the color. Our Golden Comets will lay brown eggs only. Just as tasty, but not decorative.

I had been beginning to despair that an egg would ever see the light of day at Swans Acres. Now I am optimistic that the others will try to keep up with the Joneses, so to speak, and that we'll be scrambling, frying, boiling, poaching, and baking to our hearts' content.

Of course, because I'm such a big daggoned GEEK, I could not bring myself to cook it right away. I held it, turning it over again and again in my hands, stared at it, stared at it some more, stared at it a little longer, and finally tucked it into the fridge.

Knowledgeable persons had told V and me that The Ladies' first eggs were likely to be oddly shaped, small, or weird-shelled (apparently some first eggs are laid without shells at all!), but whoever laid this one was a real trooper. It's perfect, just perfect.

Now, to make this house-related, I probably should post something about the house. I ran into the house, egg in hand, upon the discovery of said egg. How's that? :)

Wednesday, June 14, 2006

Meet the wood float, my new BFF!

For Greg, who responded to my last post about using the wood float. I was a real nonbeliever at first. I mean, who seriously would think that going back to the plaster (the plaster you labored so hard at to just get to stay on the danged wall) and ripping back over it with a piece of wood could somehow magically make it smooth and crack-free? But somehow it does work. My old-timey plastering guide notes that scouring with the wood float is a necessary step on the process because it "gets the fat back." While I'm not hip to my 1920s-era plastering terminology, I think what it boils down to is this. The skim coat is made of lime putty and sand. Steel finishing trowels have a tendency to (I don't know how or why) separate the two and cause a less-than-strong finished product. The source I have says to go over it once with the steel trowel, just to get it to a modicum of smoothness, then leave it alone. I had a verrrrry difficult time trusting in this logic. After all, wasn't I striving for that beautiful, smooth, clean plaster wall? But by gosh, it actually worked. I put up the skim coat, troweled it over once, and left it.

"Getting the fat back" refers to the wood float's magical ability to push the lime and sand back together and compress the whole shebang into a lovely skim coat. Before I used the float, my walls looked....well, kind of sandy/plastery, not like smooth plaster should look. But the areas in which I used the float, my walls looked super smooth after I was finished. One note of warning: scouring with the wood float is a killer on the wrists! You have to try to maintain an even pressure, all the while scrubbing in circles, but also trying to not create any suction between the float and the plaster (I believe this was my downfall in the lost plaster fiasco....however, I don't want to try it again in order to prove it).

Apparently people who have oodles more experience than me with plaster can actually "polish" a wall to practically a mirror finish using a float. I don't envision that being in my repertoire anytime soon, although I'd sure like to try my hand at it. Virginia Limeworks has a finish that they use in bathroom environments that actually looks almost like a perfect white piece of marble, minus the graining and feathering. It's that smooth and shiny. In person, it's absolutely drop-dead gorgeous. When I had the good fortune to spend a day with Jimmy Price and the VL gang last summer (part of Travis McDonald's Poplar Forest program, which totally rocked!), I practically had to be dragged from their demonstration rooms. I kept stroking this lovely, shiny, smooth, polished surface. It was amazing. Incidentally, if you're ever in the Lynchburg area and are into lime, plaster, and/or museum-quality restoration work, I highly, highly, highly recommend visiting Poplar Forest and giving the guys at VA Limeworks a call. Both experiences are fantabulous. :)

Tuesday, June 13, 2006

Well whaddaya know--the encyclopedia was right!

The recipe I used for plaster came from an old encyclopedia, which also mentioned the after-care of plaster. This included misting (did that) and scouring with a wood float. When I first tried to scour the plaster, it was not quite cured enough, and some of it stuck to the wood float and came off. This, obviously, was not the intended result, so I stopped. But I did mist. Scouts' honor!

Now my beloved skim coat that took so long is cracking here and there, despite the misting. I figured I had nothing to lose by trying to scour it with the wood float since it has cured for a couple of days now. With more than a little trepidation, I took said float in hand, wet it down, and began scrubbing my sweet, innocent plaster wall in a circular motion. Hard. Holy moley! Everything kind of evened out, the cracks disappeared (with a few exceptions . . . feel my pain below), and my wobbly uneven skim coat began to look like REAL plaster that had been done by someone who knew what he/she was doing. Do you believe in miracles? Yes!

Now, the problem. There are a few small areas of the wall on which the scouring did not work. In fact, on these areas, large chunks of skim coat began to fall off the wall as I scoured. Not cool. Not cool at all. And I have no idea what made the difference from one area to the next. What the heck?

?????????

Soooo, it looks like I have a bit of patching to do. I'm not looking forward to that, especially after all the mini anxiety attacks this danged wall has already given me. Looks like I've got a lot more experimenting to do as well. Thank goodness the bathroom walls are nearly always covered with a shower curtain and are only visible to V, me, and, once I post pictures, all my friends in cyberland!

Sunday, June 11, 2006

Ode to plaster and those who love it

I will never win a prize
But future owners may think me wise
For my use of plaster.

Three coat stuff is what I mean
The hairy, skim, and in between
Putty, sand, and hair of horse
The subject of my discourse
Is plaster.

The scratch coat wore down my strength
Coat #2 had a long curing length
The skim coat, though, really takes the cake
For attempting to smooth it made my poor heart ache!
Oy! Plaster.

So to all of you in love with lime
Pray, make sure you take the time
To stop, and have a glass (or two, three, four) of wine
Before you inspect
Your plaster.

You might have guessed that I skim-coated the bathroom this weekend. It was a busy weekend indeed! Between V and me, the bathroom got skim-coated, two huge shade beds got laid out, edged, and partially lasagnaed (i.e., sheet composted--Never again will I dig and till a bed until my arms ache. Oh no, not me! Henceforth, my aching arms will be due only to plastering, drilling, carrying, and the other myriad "ing"s that come with owning an old house).

And I'm really proud of the plastering job. As long as no one holds a raking light across my walls, that is.

Wednesday, June 07, 2006

Too barn exciting

V and I are looking into having a barn built. It'll have at least two stalls for horses, space for a tackroom/feedroom, space for a little workshop, and probably two open bays that we'll use as a garage. So far, the frontrunning company is www.countrycarpenters.com which has kits they sell and ship. Their barns are timber framed, mortise-tenon joinery, which I thought would be ridiculously and prohibitively expensive. But it turns out they're not all that much more expensive than we'd pay to have a barn framed out and built. Plus if we buy a kit we can "invite" (read: force to come) all our friends and family over for a barn raising. We'll feed them, and feed them well, but they'll have to work—hard—for it!

We're still wrestling with where exactly to put it, but more and more we're leaning toward putting it on the west end of the property, near where the sad existing garage is now. That way we can extend the driveway/parking pad to run up to the new garage/barn, and there's definitely room to create a little runout pen for the future ponees. For real turnout days we'll have to walk them down to the pasture, but at least with a runout they won't be stuck in their stalls all day long, plus we'll be able to regulate their grazing. Good for their health (especially with that lush spring grass...no foundering, please!!) and good for the pasture, because it won't get overgrazed quickly.

Let's get plastered, part deux

Today I ordered a 5oo-plus-page book on plastering from Amazon.com. Does it bespeak some sort of obsession or sickness that I am already eagerly anticipating it, to the point of imagining what kinds of illustrations it might have?

I also ordered a book on basic wiring. We've got so many fixtures to rewire, and you never know when you'll need extra outlets and don't want to pay an electrician a gazillion dollars to come do it. Hopefully we won't end up spending a hospital a gazillion dollars to mend us after we do some homespun wiring work...

But back to the plastering book. I currently have a test wall set up, with at least three different mixes on it to check consistency, crackage, curing time, and all that good stuff. But it seems my thirst to learn all things plaster is insatiable. And I'm a ridiculous overachieving studier, so anything I have an interest in, I read and read and read and read and read about. To me, it's fun, and hopefully it'll keep me from making a big fat mistake on a very important wall in our home. I managed to find a couple of UK-based (and since they're total light years ahead of us when it comes to plaster knowledge, appreciation, and care, I give their reviews extra credence) reviews of this book and it seems to be a pretty good one. I feel like a kid at Christmas. :)

Tuesday, June 06, 2006

Chicken run!

Well, it was bound to happen, and on Saturday, it happened. The Ladies got LOOSE! V and I were moving the coop and run, like we do every 3-4 weeks (the Ladies like fresh grass to scratch and eat). To do so we have to herd the Ladies into their big run, then move the coop setup in three sections. It's a lot easier to move the coop when the doors are open, and this time we apparently forgot to slide them shut when we were finished. I was refilling food, water, etc. when I looked down to my right and noticed a chicken standing beside me. As I processed this ("well, hello, little hen....wait a minute....aren't you supposed to be inside?"), I looked around and saw all five Ladies be-bopping around the yard.

Twenty frenzied minutes later, the Ladies were all back inside their coop safe and sound. I'm sure it was quite a sight, though. Two adults scurrying around while chickens flap and cluck and run. Aaaaah, country life! I wouldn't change it for the world, though. V and I were just talking about how we'd rather be outside working — we're talking hard, manual labor here — than doing almost anything else.

I so want to be off the grid.

Thursday, June 01, 2006

Still looking for that buried coffee can of gold...

Our eyes are definitely bigger than our tummies when it comes to working on the house. Seems like everything we come up with is going to cost major dollars. Major. It would be so much more fun to do cosmetic work (who wants to come help us pull down the duck wallpaper and fake paneling wallpaper in the den?), but we've got bigger fish to fry. Like the somewhat frightening slope in our kitchen and laundry room floors. Or the much-peeling paint on our windows. Or pulling down the cruddy aluminum siding to peek at what's underneath.

Instead, we're now talking about what to do with the outside. Where to put the eventual barn, what kind of barn to eventually put up, where to put the rose and herb garden, where to move the chicken coop, all that good stuff. Classic avoidance. We're textbook!

Monday, May 15, 2006

My recipe for lime putty and lime plaster

You asked for it . . . here it is!

I bought Type S Hydrated Lime at my local masonry builders' supply. Since this was my first time making lime putty I really wanted to go with a true quicklime or similar product, but the Type S was available, and from what I'd read it seemed as though it'd work. (note: finding plaster recipes is really hard, but if you look for fresco plaster you'll have much better luck, at least I did). So I took a 5-gallon bucket, filled it about a third of the way with water, then began adding lime and stirring until it was all well mixed. I continued to add lime and to mix well until my putty had the consistency of a thick yogurt. Then I covered the whole shebang with about an inch of water so the lime wouldn't begin to carbonate, and let it sit for a while. Funny thing about lime putty, it's actually better the longer it gets to sit, but I didn't have time to wait too long. My next batch of plaster will have great putty because I mixed it all at once and what I didn't use in our bathroom is happily sitting in 5-gallon buckets, covered with water, continuing to slake and get completely hydrated.

Getting good, sharp sand was not easy either. I ended up using general-purpose medium builders sand. Probably a little coarser than what I really needed, but so far (knocking on wood) it's holding up. I did NOT use any gypsum ("guaging plaster") because it does not hold up well in a moist environment, and let's face it: a bathroom is quite a moist environment. So we sent lime, sand, hair only.

Mixing the plaster went as follows:

  1. Slop out some lime putty (keep track by volume of what you're using) into a mixing tub
  2. Add sand: I found my recipe in a 1920s era encyclopedia. They suggested using a mix of one part putty to three parts sand for "coarse stuff," one part putty to three parts sand for the second coat, and putty alone or one part putty to one part fine sharp sand for the skim coat.
  3. "Knock it up" by mixing, beating, mixing, beating, mixing again and it will become more and more plasticized
  4. Add the hair. The amount of hair is kind of a judgement call, especially since I was not making much plaster. I added and mixed until it seemed like things were fairly "hairy" and then put some on a trowel and hit it sharply against my bucket. I ended up with about a 5-inch glob of plaster with lots of hairs visible hanging down. A fabulous, fabulous session at the Traditional Building Conference taught me that little rule of thumb...er, hair. My old encyclopedia notes that the second coat can be mixed minus the hair or with the hair in halved amounts, and straight putty or one part putty to one part sand for the final coat.

After I had what I thought was a reasonable mix, and after thoroughly wetting everything and spraying with a bonding agent, I started troweling it onto the walls. I have no shame when I say it's HARD to get plaster nice and even. HARD. Luckily, since this is the bathroom (which is the experimental room anyway and will be changed extensively at some point), I did not worry too very much. Figured if it stuck to each other and to the walls, we could sand down where necessary and make it all shake out.

All my plaster notes made mention of slopping the plaster on, then letting it sit for some time before "working it up" with a wooden or plastic float. This "working up" is apparently not my strong suit. The first time I tried it, a lot of my plaster stuck to the float. Uh-oh. Must have not let it set up long enough. The second time I tried, maybe things had been allowed to set for too long, because it didn't really feel as though I was doing anything. Time will tell, and I'm sure I'll get better at it with each new project. After all, plasterers used to apprentice for months, even years, before they were allowed to do any plasterwork in a visible location! :)

Friday, May 12, 2006

A suitcase full of goodies, indeed!

A few days ago the folks who sold us the house contacted us to let us know they were coming up our way, and would we be able to get together? They had, they said, "a suitcase full of goodies" for us. Well, fast forward to yesterday...we got together for dinner and then went back to the house to visit. They're extremely nice people who obviously love the house, and they seem happy that they've chosen us to continue its legacy.

But on to the suitcase full of goodies! V and I are now the proud caretakers of wills and deeds dating back to the late 19th century, marriage licenses for some of the former owners, letters written to several of the inhabitants across the history of the house, pictures from every era one can imagine, tax records going back to the 1800s, and assorted other fun stuff! It truly was an amazing evening going through it all with them.

The husband (we'll call him "P") mentioned that he had been adopted, and that he'd been in several orphanages and/or foster homes before he came to live in the house. To him, he said, the house was the first place that actually felt like a home. This is why he was so determined that the "right" people bought the home.

Yeah, that made me get all misty, too. I'm misty again just thinking about it.

As they were leaving, I told him that this is the house V and I had searched for for a very long time and that we had stopped believing it existed. I think that pleased him; I hope he realizes just how important this house is to us and that he's happy with his decision to sell to us rather than some of the other would-be buyers who expressed interest.

Sunday, May 07, 2006

Looks like I'm not a bad plasterer--I hope!

So far, the plaster in the bathroom is holding up nicely. It has not cracked, it's all still on the walls, and it seems as though it's curing well. Time will tell, but for now I'm just ecstatic to not have rusty, cracked walls with big holes in them. Our bathroom makeover was nearly total, but thankfully it was not super expensive. Here's what we did (pictures to come soon--just need to download that memory card.....)
  • wet-scraped paint until I was blue in the face
  • knocked rotted plaster off the walls by the bucketfull
  • replastered walls (made my own lime putty, mixed the plaster, and installed it too)
  • painted the walls a beautiful russet color (if you can't beat the rust, you might as well join the rust!)
  • removed all the old caulk and recaulked the tub
  • removed the bookcase that had been serving as a repository for assorted toiletries and extra towels, washcloths, etc.
  • bought some baskets (thank you, Big Lots!!) and transferred all the above-referenced stuff into them
  • put said baskets onto the over-the-toilet etagere to dress it up a bit

Once the plaster is completely cured, we'll sand it a bit, then paint the patched areas. Hopefully when all is said and done, the patches won't be horribly obvious and we'll have a lovely bathroom. Hey, it may not be Architectural Digest material but we love it all the same, and I'll be mightily proud if that plaster continues to hold!!

It looks like a completely different room. Boy, I really do need to get those pictures up.

Thursday, May 04, 2006

Things I'd forgotten we had

Have you ever noticed that when you move, you pack away all sorts of things that you promptly forget you have? We have duplicated many a home improvement whatchamacallit because we forgot we ever had one to begin with.

Case in point: painting materials. Last night I went down into the cellar to retrieve a respirator and our 6ML dropcloths so I could create the "air-lock" for the bathroom to protect the rest of the house against lead paint dust. We have more brushes, paint can openers, roller frames, roller covers, roller handles, hats and shoe covers, and other paint paraphernalia than you could ever imagine. It's because we never bothered to look at what we already had....or, we'd get to the store and impulsively decide to paint something without any idea of what we had in the way of supplies, so we'd buy all new. Not so smart! At least we're ready if those walls are ever fully plastered, cured, and ready to paint.

I shudder to think of what else we have several of. At least we stopped with one house!

Tuesday, May 02, 2006

Let's get plastered!

The lime putty is curing, the sand is ready to mix in, and I'm super gung-ho about this whole plastering gig. All I need is hair--in my case, I'll use horse (readily available at the stable where I ride) although cow is what's probably there now.

The bathroom is going to be scary and creepy no longer. I don't even know if I mentioned just how scary and creepy it's become. The paint is peeling dreadfully because of all the moisture, and the plaster, which I suspect has a high gypsum content, is not happy at all when moisture gets into it. That's why I suspect the gypsum. True lime plaster would handle moisture much better.

We'll be without a shower until the plaster cures, which could be as long as a couple of weeks. Thank goodness for that membership to the gym! Get fit and take advantage of shower facilities...nothing says "I'm restoring my house" like strolling into the gym covered with gook and dust, just to use the shower because you're too tired after working on the house to work out. Yep, that's us.

Before, during, and (eventually) after pictures coming!

On an unrelated note, V and I finished the next boxes for the hens. I'm getting some bedding tonight, and we'll put the boxes into the coop to see what kind of reaction we get. We've got golf balls all ready--to put into the nests so they know it's OK to lay their eggs there. I sure hope they start laying soon!

Friday, April 28, 2006

Fresh-cut grass....the bestest smell that ever there was

V and I finally knuckled under and bought a garden tractor. We really wanted a Kubota with attachment capabilities, but that will have to wait a few years, so we decided to get a Huskee from Tractor Supply Company. It's not the highest of the high-end garden tractors, but it'll do until we can afford the orange! We already mowed the whole 4 acres with it, and it did a great job. The pasture takes a loooong time. At least it seems like it takes a loooong time because there's nothing to break it up. You know, on the regular yard there's an outhouse to steer around, several trees, the chicken suite, etc. Not that it's a full-fledged slalom course or anything, but there's a bit more excitement to be had than out in the pasture.

And now, some of my favorite smells:
--fresh-cut grass
--sawdust (not kidding, I love it!)
--lilacs
--sun-dried laundry of any kind

How's that for random??!!?!? :)

Monday, April 24, 2006

SWEET! It's a chicken suite! Or, life on the farm as we know it.

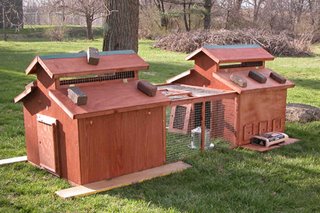
V and I spent an idyllic weekend on our mini farm, doing mostly farm chores. The first thing we did was add to our chicken run to give the ladies a bit more space to flap, scratch, and peck. It just so happens that we have a portable dog run--a really nice, heavy-duty brass one that pins down into the ground. We thought it might work as an additional little pasture for the little gals...and though it took lots of creative thought along with some sweat and more than one scraped knuckle, we managed to make it work, and the ladies love it! They can really stretch out if they want, and there's about 3X the grass to nibble on. Even I never realized just how much fun having chickens would be!

Project #2 was mowing the lawn with our brand spanking new garden tractor. It's got a 54" deck to make mowing 4 acres a tad shorter, at least. So far, so good, although the hills are really scary. Those will take some getting used to (unless we manage to plant them up before mowing time rolls around again). Eeek.

Project #3 was to mix up some lime putty, but project #4 kind of took precedent.

Project #4 was dinner! BBQed chicken on the grill and HOMEMADE ICE CREAM and HOT FUDGE. Ohmygosh, what a lovely way to finish off the day! Then we went inside, watched West Wing, and hit the hay as tired little farmer wannabes. What a fun weekend.

It's time for lime, baby! But why doesn't anyone have it?

I'm ready to buy some quicklime so I can slake it and make lime putty for plaster and mortar repairs. Only problem is, no one seems to sell it! Our local masonry supply shop had Type S hydrated lime, which will do in a pinch, but I'd really like to use traditional methods and materials, which means buying limestone and burning, then slaking it, or at least buying quicklime and slaking it. No dice, my friends! Now, I know the guys down at Virginia Lime Works (www.virginialimeworks.com), who do amazing work, sell lime putty and such, but Virginia's a mighty long way away. Mississippi Lime Company also sells it--but again, kind of far away. Plus (at the risk of sounding like a whiney restoration brat), I want to do it myself!

If money were no object, I'd open a store that had salvage as well as all sorts of traditional building materials--hand planes, lime and/or premixed lime putty, good quality graining tools and pigments, you name it! Of course, I'm probably the only person who'd shop at my own store...that could be problematic.

It's just frustrating to have the desire but to have such a difficult time finding the materials!

Thursday, April 13, 2006

Plaster, windows, and mortar, oh my!

I was at the Traditional Building Conference in Chicago last week/weekend. It's good to stay up on the latest wisdom about restoration, and checking out the new technology is always a hoot. This year was fabulous. I attended seminars on lime mortars in cold climates (appropriate), plaster adhesives for plaster that has lost its keys, window restoration, sympathetic additions, traditional decorative graining tools and techniques, and a whole bunch of other incredible cool subjects. I'm such a restoration geek, I know it. Who else gets excited to learn about plaster adhesives? Besides all the other restoration geeks at the conference right alongside me, that is. :) I made some new friends, learned a LOT, and will be trying some new tricks that I picked up along the way. All in all, a very successful trip!

Probably one of the coolest sessions was the graining seminar. A delightful Scotsman who is beyond talented took us through his process for replicating burled maple, birdseye maple, walnut, and tiger oak. When he was finished (and these were just quick-and-dirty samples) one would be hard-pressed to tell the difference between his painted versions and the real deal. He mixes his own paints with beer (not kidding), water, pigments, sometimes linseed oil, and other traditional materials. And whoaNELLIE the results are amazing! I can hardly wait to practice, although I'm sure my clumsy attempts will be sad at best. Still, it'd be a very cool thing to learn.

Tuesday, April 11, 2006

The ladies are HERE!

I know it's been a while since I've posted, but I have excellent reasons.

1) I've been out of town for the last several days on a combo business/personal fun trip to Chicago...more on that later.

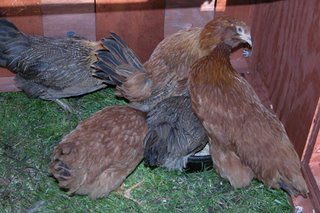
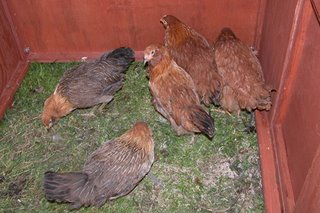
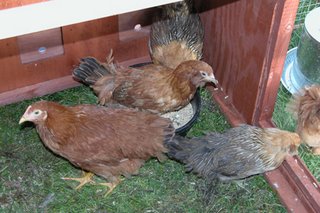
2) The chickens are officially ensconced in their little super suite! I've already named them, of course. I'm calling the true "redheads" Mattie and Lisa, and the red/speckled black and brown hens are Fiona, Edie, and Stella. Mattie and Lisa will lay brown eggs and Fiona, Edie, and Stella will lay Easter egg colors. I'm beyond giddy with anticipation about the first egg, which we probably won't see until sometime in May.

First, a few pictures:


The bricks are to keep opossums and raccoons out until we come up with something better or more permanent.


Aren't they lovely? We have CHICKENS! :P

Tuesday, March 28, 2006

How many bugs have made themselves a home in our attic?

I wish I could even come close to calculating. Let's just say there are a lot. We've got wasps, ladybugs (the smelly kind), bottle flies, and who knows what else up there. The scary thing is that the wasps (and all the others, but the wasps seem to be the most aggressive) have been making their way into the house. Not cool.

Last night I went into the attic armed with a respirator, head-to-toe skin coverage, and two cans of super-strength wasp/hornet killer. The instructions said to have one point of light--located away from me since any stinging types would be attracted to the light--and to spray from a distance of at least 7-10 feet from the nest. So here I am, in dim (at best) light, spraying nests. Imagine my horror when I suddenly hear loud angry buzzing coming right toward me. Ack! I sat very, very still on my board-across-joist perch, and hoped they would in fact go toward the light (pun intended). No luck. Some did, but a few landed ON ME. And they were not happy, not happy at all. It totally freaked me out. I wiggled back through our cubbyhole and down into the bathroom and proceeded to have a major case of the willies.

The worst part about all of this is that I have to go back up in two days to scrape down and dispose of the nests so they don't come back and set up housekeeping again. I'm sure that'll be great. Just great.

The attic is going to be a project in itself. We need to get up there with a whisk broom and dustpan and clear out all the dust, spiderwebs, old nests--bird, bug, and otherwise, nut hulls left by trespassing squirrels, and all that other stuff. Then we need to insulate it; only problem is we don't know how we'll get insulation into the attic. The cubbyhole is 22 inches wide and about 16 inches deep. Just enough for a human . . . probably not enough for a human and/or a large roll or pack of insulation. Looks like putting in attic stairs might jump over some things on the priority list.

If you don't hear from me soon, it's because I lost my mind upon trip #2 into the attic to vanquish all things stingy and mean. I may be in a corner somewhere, curled into the fetal position and weeping ever so quietly.

Wish me luck.

Monday, March 20, 2006

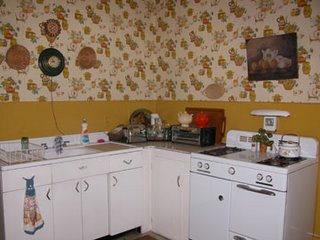
Now for your viewing pleasure--pictures of the $200 temporary kitchen makeover!

Before:


After (more like during--but it's after we managed to hang all the shelves...). Note all the glorious counter space we now have! And look at how much space we still have on those shelves!! Not for long, I'm sure, so I'm basking in that extra space now.

Also note the very full glass of wine sitting on said counter. That was a very welcome addition to dinner last night.


I also promised comedy in my last post, regarding leveling the main hang track. You may not be able to see it in the pictures, but our kitchen really, truly, seriously slopes to the west/northwest. When we were leveling our hang track it became scarily apparent. I view this as semi comical, just because we knew it sloped but had NO idea how much until we put up something that is actually level according to "the bubble." Wow.

Our $200 temporary kitchen makeover

Success! After searching fruitlessly at IKEA and a few other places for something--anything--that we could use in our kitchen, we finally found something in Lowe's. You know those ClosetMaid shelving systems? Well, we are the proud new owners of a ClosetMaid kitchen! It actually turned out very well. We're happy with the way it looks, you can't beat the price, and our storage space quintupled (maybe more) in the space of an afternoon. Yeah, us!!

Kitchen makeover day wasn't without its problems, however. The first was finding a stud. It's true that studfinders sometimes have trouble with plaster walls...so we began at a corner and figured on measuring out from there. Logical, right? Sure, except that our studs were a little different. V literally drilled 2, maybe 3, dozen pilot holes before we found a single stud. Each time he drilled I'd say a little prayer to St. Anthony (patron saint of lost causes) and hope for the best. But no. Each time I'd hear this gritty little "zzzzzmnpphhh" as the drill went through the plaster and lath into the air behind. Argh! There was also the fear of nicking either A) an electrical line or B) pipes, since our plumbing wall runs behind our kitchen wall. Thankfully, neither of those scenarios played out. Eventually he hit paydirt, and we began to measure in earnest.

First, we made ourselves a level line (which had comical results later--you'll see). Then we drilled our pilots so as to hang the main track for the shelving system. So far, so good. Never mind that we wore down one entire drill battery just trying to find our first stud! Once we had the main track hanging, it was pretty much a piece of cake. We hung vertical supports, then put brackets up, and popped our shelves into place.

It might not get us onto any big-time restoration/renovation shows, but again--this is a HUGE improvement for us. Where once we were like lost lambs, searching for a dinner plate or perhaps (dare I ask it?) a coffee cup, now we are confident kitchen-goers with homes for those things! Huge, I tell you!

I'm having a little technical difficulty posting the pictures at the moment, but I promise to put some up soon. It's so exciting!

Tuesday, March 14, 2006

Monsoon season brings with it the discovery of a leak!

We have been having some serious rain lately. By serious, I mean that it has rained basically nonstop for the past 4 days. Bleah.

One thing that all this rain has allowed us to discover is that we have a small flashing problem with our vent stack. Late the other night, when it was raining really hard, we heard this slight "thunk, thunk, thunk, thunk" sound. A little investigation led us to the stairway, where the sound was louder, particularly in an area where the ceiling appears to be a bit stained. Sure enough, it was damp! Off I went into the attic for a closer looky-loo. It was raining the last time I went up, but apparently not hard enough for the leak to manifest itself. This time was a different story.

Way back when, I posted that we'd discovered a small leak in the roof. Now I know exactly where it's from and what's necessary to fix it. Yay!

Closets at last!

Well, our trip to IKEA was only partially fruitful. We did come home with two small armoires that will become our instant closets. We had, as I think I mentioned, been using those rolling clothes racks--until they became health and safety liabilities. One decided to end its sad, overloaded life in the middle of the night one night. Talk about waking up to some freakiness!

At least I can say that we have successfully eliminated the rolling racks from our bedroom. Hip hip hooray!

The kitchen was another story. IKEA just didn't have anything that fit into our plan, which was to have A) flexibility, B) strength, C) minimal damage to walls, and D) functionality. Were we silly to think we could find all four? Apparently so. The wall storage we liked best did not allow for the possibilities that our studs wouldn't be exactly 16 inches on center. The wall storage that was the most flexible was nowhere near strong enough, plus it wasn't functional. The wall storage that was the strongest had no flexibility at all, and truth be told, it wasn't very functional for what we needed. Back to the drawing board.

But YIPPEE we have closets! Sort of.

Friday, March 10, 2006

Hi-ho, hi-ho, it's off to IKEA we go!

V and I are making a trip to IKEA tomorrow to pick up some house stuff, mainly for the kitchen and bedrooms. I know what you're thinking: "GASP.....why on earth are they putting IKEA anything in that house?"

What it boils down to is that IKEA will allow us to do a temporary kitchen makeover with very little money. That's important! And a few shelves, hooks, and/or racks can make a big difference. A hanging spice rack, for instance. Frees up almost a square foot of counter space (of which we have a total of approximately 6 square feet, if that). A dish rack where we can put some of our everyday dishes and glasses. That'll free up space in our hutch so we can put our good china together. Convenience itself!!

Plus, we're going to pick up a couple of inexpensive armoires. Our closet situation is dire...until last night we were using those rolling metal racks from Target. But that is apparently not going to be a workable long-term solution because they're breaking right and left on us. One wobbles scarily whenever you move it or put something on it or take something off. Since those are the three things one is most likely to do with a rolling wardrobe rack, you might be able to see how it's not ideal for us. :) So, we figure we'll get a couple largish armoires and put them in the bedroom (thank goodness for nice LARGE bedrooms) to use as temporary closets. If they work out, they might just become permanent closets. Who knows? Maybe I'll end up doing some sort of decorative treatment on them so they look less IKEA and more, I don't know, country chic.

I'm really looking forward to the trip, and I'm especially looking forward to helping ourselves out a little with some storage solutions! We sure need it.

Wednesday, March 08, 2006

Must've been something it ate? :)

Our septic system seems to be all better, all on its own. All of a sudden, the toilet started throwing down the water like she used to, and the tub started draining nice and quickly again.

We'd rather not go through this again, so we're calling out the septic guy who takes care of our neighbor's property. They say he does a great job. With any luck, he'll be able to tell us a little bit about our system. Like its capacity, how old it is, what condition its in. You know, the little stuff.

I can't believe it--two posts in one day! Wowsa!

Bock-bock-bock-bock-bocOCK!

Guess what a certain someone is getting for her birthday? HENS! And a henhouse!! Yes, you read that correctly. I'm getting some much-longed-for hens, along with a little coop and yard. Here's how the conversation went:

V: So, when you talked about having some chickens, were you really, truly serious about that? Or was that kind of a joke? You were kidding, right?

Me: Uhhhh, no. I'm totally serious. I'd hop off the grid right now if I thought we could do it. Why?

V: Well, you know your birthday's coming up . . . I thought maybe (taking extremely slow, deep breath) I could get a coop set up for you, and you could get some chickens. (Expels deep breath in a long sigh. Sadness? Resignation? Who knows? All I heard was "get some chickens"!!!!!)

Me (literally clapping hands and jumping up and down): Wheeeeeeee! Let's look on the Murray McMurray hatchery website right this very minute to see what varieties we want!!

V: (another heavy sigh) OK.

So, once we have the coop set up, we're going to have a couple of each of these: Buff Orpingtons, Silver-laced Wyandottes, Ameracaunas, Light Brahmas, and Crested Polish. I'm practically giddy. No, I'm absolutely giddy. Chickens! One step close to self-sufficiency, baby!

Monday, March 06, 2006

Bring on the power outage!

OK, not really, honest. But our generator is here. We ordered it through the same electrician who rewired the house, and again they gave us very good (if a little slow this time 'round) service. Not only did they deliver it, they tested it, showed us a few tricks of the trade to keep it running and well maintained, and didn't charge us a dime for the human aspect of the whole deal. Granted, we paid them quite a little bit of cashola to rewire the house, so maybe throwing in a little free labor isn't so hard for them to swallow. Still, it's a nice show of good will.

The generator's great, if a little LOUD. It sounds like a small tractor. But it's got enough juice to power up almost half of our house, including our well pump, fridge, furnace/AC, several ceiling lights on each level, and a few outlets on each level.

Hopefully we'll never have to use it, but if the time comes for a nice long power outage, we'll be ready! And--bonus--it's got outlets on it, so even though we don't have electricity in our garage, we can run power tools to our little hearts' content and not have to do it close to the house. Joy!

Friday, March 03, 2006

Spring is in the air!

Can it seriously be February 20 since I last posted. Uh oh, I'd better get back into the swing of things. Not a whole lot new on the house front. Our generator is supposed to be in soon, so we'll be prepared in case of a lengthy power outage. Other than that it's been a little quiet.

Our spring project list just keeps on a growing....
  • rebuild chimney from attic up
  • replace a few slates here and there in the roof
  • scrape, prime, and paint the gutters and downspouts
  • scrape, prime, and paint window/door sills and frames
  • install new, true divided light 6-over-6 wooden windows (what we have now are baaaaad aluminum replacements from the '60s) and storms...this is likely to be a multiyear project as we won't be able to afford them all at once...maybe one or two at a time if we're lucky and win the lottery
  • pull off the steel siding, one wall at a time, and scrape, prime, and paint the clapboard underneath
  • start patching plaster
  • fix the questionable joist under the kitchen
  • repoint the foundation in spots
  • pull up carpet
  • pull down wallpaper
  • gather items that will be going to auction
  • add on a bathroom/laundry room combination

I'm a little freaked out just looking at the list, but if we do it bit by bit we'll be OK. I hope.

Friday, February 24, 2006

Best cartoon strip ever

If you are not familiar with Get Fuzzy, I highly recommend that you start reading it, especially if you have a cat or a dog. They're spit-coffee-on-your-keyboard funny sometimes.

http://www.comics.com/comics/getfuzzy/

It took a while for us to warm up to it. We started out with one book that we found in the bargain bin at Borders. It had a cat and dog on the cover, and looked like it might be somewhat humorous, so what the heck? It was less than five bucks. Well, 10 pages into it and we were hooked! It's a very clever cartoon. Sometimes I'm not sure I get it. But I still laugh. Oh, yes, I laugh.

Monday, February 20, 2006

The great unknown: our septic system

This may fall under the category of TMI! TMI!!, but it's house-related so I feel I must blog about it. Our downstairs toilet is now not flushing properly. This means we are forced to use the upstairs toilet (see the most recent prior post to see the glorious experience that must be). We used an enzyme build-up remover in it, and this has seemingly helped. But she's still not sending the water down with as much gusto as she used to. Yesterday V and I bought a closet auger and tried unsuccessfully to send that sucker down into the trap in case there's a clog. One extremely frustrating half-hour later, after having no success whatsoever with the auger, we began to despair that our toilet may just be on strike.

My fear is that it is somehow septic-system related rather than toilet/plumbing related. We don't even know quite where our septic tank is. I guess that's one negative offshoot to buying a house that's been uninhabited for so long. People are like "well, I think it might be over there" as they jerk a thumb in a far-too-general direction. We might have to shell out to have someone look for it, which I assume they can do with radar/sonar. If Ballard could find the Titanic amidst a target area of hundreds of thousands of acres of water, they can find our little septic tank located somewhere on four acres, right? I hope so.

Having grown up on a farm, I know a little bit about septic systems. I know there are certain things you just don't do--you don't use chemical cleaners because they can destroy the bacteria that you need to break down that waste. You watch what you flush, even to the brand of toilet paper. Some wad up and don't break down quite so easily as others. I have no idea what size septic tank we have, but I do know that they should be pumped out occasionally. How occasionally? I don't know that much!

If there's anyone out there with septic knowledge that's just overflowing (pun intended), please feel free to pass it along! In the meantime, we'll be using the scary bathroom.

Thursday, February 16, 2006

How to make over the smallest bathroom ever

DH and I going to do something to the downstairs bathroom. Don't ask me what we're going to do, but we've got to do something!! The paint is peeling/flaking off like crazy from all the moisture, we've got no storage save a medicine cabinet, and it's a little small. OK, it's really small. It's about 4 feet wide and about 7 feet deep. And this is our large, full bath! In the one upstairs, you can't even close the door unless you do it AS you're sitting down onto the toilet. But I digress. Back to the "big" bathroom.

The reason I'm posting is that what we're planning to do is definitely not perfect, but we just need something to get us by until we're really ready to make some changes in terms of possibly an addition. Here's the existing situation:


  • entire bathroom--including shower--is paint (no tile, no water repellent surface of any kind)
  • as I mentioned, there is no storage other than the medicine cabinet
  • right now we've managed to squeeze a tiny bookshelf in to hold towels, etc., and there's one of those over-the-toilet etageres (we don't particularly like it) holding other essentials
  • we have nice original fixtures in here--a small but wonderful cast iron tub with shower (the only one in the house), a pedestal sink that's--again--tiny but really nice in its own way, and spigots and such that are simple but filled with character. This stuff all stays no matter what.

being as how it's an old bathroom it's not vented. There is a small window that we try to crack in order to let some of the moisture out. We understand that this is what's killing the paint, but we may or may not be able to properly vent due to the configuration and location of the room. This is an unknown.

The tricky part is that we can't afford to add on right now or bump out, so we're forced to figure out something within the confines of the size and configuration we've got right now. One thing we'll do is scrape and paint. Since it's just temporary (hopefully) I think we're going to go ahead and just put paint in the shower again. If we go with paint we can at least choose a color where it doesn't show as much and/or repaint as necessary.

Here's a picture from when we first toured the house. It is not nearly as roomy as this picture makes it look (she types, dripping with sarcasm) now that we've got the bookshelf and etagere in there. What a project this will be!


Oh, and just for fun, here's a picture of the small bath. I crack up just typing that. It goes way beyond small, but I'm not sure there's a word in existence to describe it.

Monday, February 06, 2006

One of these days we're actually going to start working

V and I are planners to our cores. We never start a project without analyzing, analyzing, and analyzing some more. We pore over every detail, work out every possible case scenario, and then pore over other details that came up in the various scenarios. It's enough to try the patience of a saint, I'm sure, which is why it's good that we're both this way!

Anyway, I think we're inching our way forward to the point where we'll be ready to actually BEGIN WORK! Woohoo! Never again will our evenings be filled with lounging in front of the TV. Never again will we have a dust-free (or at least dust-minimal) house. Never again will we be able to simply walk through a room without skidding on dropcloths, tripping over Tyvek suits, or looking at all the work yet to be done. I'm tired just thinking about it. :)

Saturday, January 28, 2006

What would you do?

We're continuing to wrestle with some philosophical and emotional issues concerning the house. First is whether we will want to put up wallpaper in the rooms that were originally papered. I'm not sure, V is leaning toward it, but I don't think either one of us is convinced--or convincing--enough.

Second, if my paint analysis shows that the molding finish was originallly just shellac (which is what I suspect) and not paint, are we going to strip all the way down and re-shellac? I've seen this done very well, and I've seen this done very poorly. Our trim is not crazy super elaborate, but the thought of stripping out all of those nooks and crannies gives me hives. On the other hand, I love the look of wood/shellac. V is concerned this might make the rooms appear too dark, but we've seen it in other houses that I wouldn't consider dungeonlike by any stretch.

Third, what to do with the kitchen? Temporary makeover or gut it out and bear it until we're ready for the real deal? I say temporary makeovers can really help make a room work until you're prepared to do better. Haven't asked V 'bout this one and probably won't until I can get a decent dollar amount in my head. Cost estimates may make or break my case!

Friday, January 20, 2006

Spring cleaning, a little early

V and I have decided to give ourselves until the spring to figure out what's going and what's staying. Having two houses' worth of STUFF is getting a little overwhelming. There are some lovely things here that, honestly, just aren't our style, so they'll probably go to a good home where they'll be appreciated.

Now our big worry is finding a good and reputable appraiser. There is such a wide variety that we don't know whether to find a really good generalist or whether we should start looking into folks who specialize in, say, ephemera. One more thing to overwhelm us! Mind you, I'd rather be overwhelmed by this than by plaster falling from the walls in great huge chunks or one of the other myriad old-house-related problems we could have. Honestly. But of all the plans we have for the house, this is the one I find the most challenging, probably because it's the one where I have the least amount of real knowledge.

Saturday, January 14, 2006

Mommy's little helpers

I'm tired today. And I don't think I'm really thinking clearly. So instead of blogging, I'm just going to post some pictures of our cats. V and I are mere inches away from being the crazy cat people. It's really only a matter of time. But they have good stories.

Annie is a one-time feral. I found her in the middle of a blizzard, trying desperately to get into my parents' barn. She was very wild but decided (she's always been an extremely smart cat) to come in from the cold. However, she trusted no one until V came along and very patiently showed her that indoor life was cushy and to be savored. Now, she's the Queen of Sheba and is also known as the "fancy cat." She's very tidy--look at how white she keeps those whites!


Romeo came into my life when I was an undergrad tutoring in my school's writing lab. One night I thought I heard meowing. Being a softie, I went to check it out and found Romesie standing out in the rain waiting for a human to come along. He was just a doll. Sure that someone was missing such a lovely and giving cat, I posted flyers all over the place. Eventually a woman called me to tell him I might as well keep him "because I told my daughter he was probably dead." Uh, right then. Keep him I did! Doesn't he look like he ought to have a tiny pipe and smoking jacket? He really lives up to his name.


Birdie exploded onto the scene in June of 2002. We'd lost a very beloved kitty two months before and were not (not) looking for a new cat. Then a routine trip to PetSmart for food proved to be our undoing. There cowered Birdie, the only kitten amongst about 30 cages full of dogs. Poor thing looked terrified. She had just one eye and frankly, she looked pretty darn scrappy. But there was something about her. We took her out of her cage and she promptly climbed onto V's shoulder and perched there like she belonged. She came home with us that day.


Frasier is a momma's boy. He came around in January-ish of 2003 . Birdie was having some serious socialization-related issues and had taken to repeatedly pounding on Romeo. We thought having a playmate more her own age would be good for her. Besides, I told V, cats should always come in even numbers. Sounded perfectly logical at the time. Frasier became an internet cat date. I saw his picture on Petfinder.com and just had to see him in person. In spite of his neurotic tendencies (he'd been adopted twice and returned twice) we thought we would be just the home for him, and we have been. He seems to have bonded especially much to me...not that I mind it. It's like V has his cat, and I have my cat, and then we share the other two equally. Works out nicely, I think!

Friday, January 06, 2006

The wish list and the project list...so far

If you are an independently wealthy person and would like to contribute funds either to the wish list or to help us move projects along, I don't think we'd turn you down. This is going to be one expensive endeavor! Perhaps we should implement an "adopt a clapboard" program. Hmmmm.

The wish list.

  • Good plastering tools
  • Some supplier within 30 miles who carries Type S hydrated lime so I can make lime putty for said plaster and for mortar
  • Insulation for the attic
  • A tractor so our neighbor no longer has to mow our lawn (thank you just doesn't cover it...we have awesome neighbors!)
  • Silent paint remover
  • Good quality paint scrapers
  • Refills for our respirators
  • Tyvek suits
  • Tons of 5ml or higher plastic
  • New old windows (or custom new wood windows, but prefer old wood if we can find some)
  • A hot water radiator heating system
  • A clawfoot tub

The (partial) project list, not necessarily in this order

  • Replace windows (aluminum replacements) with good-quality historic windows, if we can find them, or well-constructed wooden replacements
  • Scrape and repaint (maybe, or shellac, depending on what our paint analysis shows) trim, doors, and windows
  • Patch holes in plaster left by electrical crew
  • Expand one-time porch (now utility room/bathroom) and add second story to whole thing to create master bath (and closet?) for upstairs
  • Pull up carpet wherever it is found
  • Kitchen—I don't even have a clue what to say here other than "kitchen"
  • Remove wallpaper and either paint or re-paper
  • Strip steel siding from exterior, then scrape and paint clapboard that is hidden underneath

Monday, January 02, 2006

Our attic is the coolest place EVER

I really, really need to get started on the historic structure report (HSR) for our house. It is supposed to be my winter project so we have a decent, prioritized list of maintenance and projects ready for when warmer weather hits. Instead, I have been Slacker Girl. Well, as of today I am Slacker Girl no more!

This afternoon I squeezed through the cubbyhole that is the only access to our attic and began the process of documenting the existing condition of the house. Overall, I couldn't have been more pleased with what I found. First, some good news--it was pouring down rain and I didn't see any drips anywhere, which means the slate roof is holding up well. I honestly expected to see a few here or there, but there's nothing. I saw a couple places where there's some very old water damage but it's not extensive. Over all, it looks like the old girl is holding up really well, thank goodness! We'll definitely need to get up there and insulate, which will be interesting considering that the joists are so close together. We also have dozens (not kidding) of old hornet/wasp nests up there. Hopefully they're empty. There's also a bat up there. Just one, which surprised me. I thought they mostly lived in groups. Guess not!

The house is, as we suspected, constructed very well. True 2x8 joists on 16-inch centers rather than the current standard (which is either 22 or 24, I always forget). I never felt so much as a wobble while I was up there. One of the chimneys looks as though it's had some problems over the years, and at one point it may have been patched with Portland concrete. We'll have to chisel that out and replace it with a lime-mix mortar.

Up in the attic, it's easier than ever to see that the kitchen is an addition. For one, it's not constructed as well. What's more fun to see, though, is the existing clapboard that they did not remove from the original house before adding on. And then there's the gable end trusses. They're just cut out to provide access to/from the addition, but you can see where they once met each other. Interesting stuff indeed.

V and I had some questions that I was hoping to answer as a result of going up there--a few of them I did manage to answer, but one is still a big mystery. We have been wondering if there had ever been a stairway or even a ladder mechanism going out of where our upstairs bath is (from the days when it was a closet).....so when I was in the attic I stuck my head down into the cavity to see. The existing stairway ceiling is all drywall and it's newer (I'd say within the past 10 years or so), which means it's been replaced fairly recently. BUT, there's plaster/lath ghosts on the backside of the bathroom wall. Isn't that weird? The walls of that cavity are also plastered, and plastered very nicely. I suspect those would not have been finished with such quality if that was never a "used" space. But there aren't any ghosts of joist notches, stairs, risers, or anything like that. So now we're more perplexed than ever. One of these days I'm taking a drywall saw to that bathroom wall! :) I'm wondering if maybe there was access, but if it was more of a haymow ladder type mechanism than actual stairs. The ceiling joists over that cavity are wider than the rest of the original house, and that makes me think there's a purpose behind the difference.

Next stop, the crawl space!